[ Cet article est disponible en Français / This article is available in French ]
This article is the continuation of the article on the building of a large terminal (part 1), and voila, it is finished.
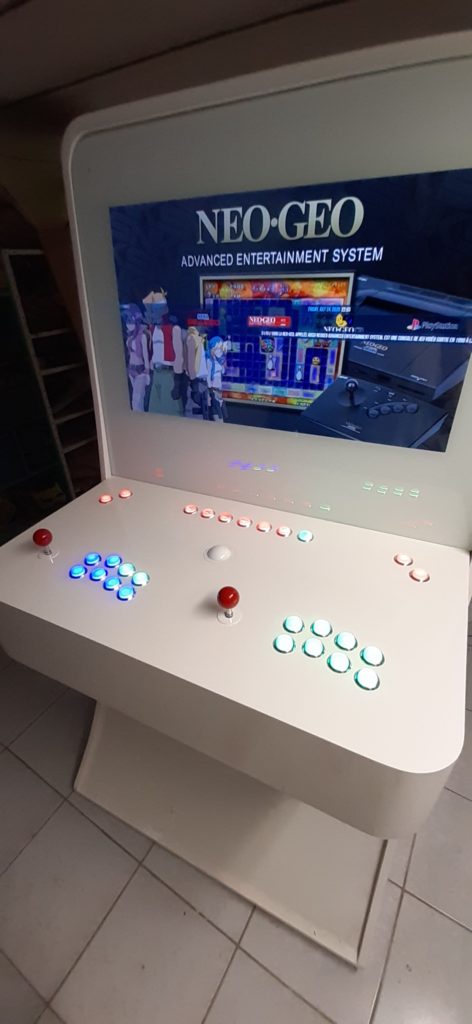
I painted the arcade terminal with a gloss paint, i bought a 32 inch display (2560 x 1440 AOC Value-Line Q3279VWF). Please note that there is no vesa mount on this screen, so it’s a bit complicated to fix so that it does not move.
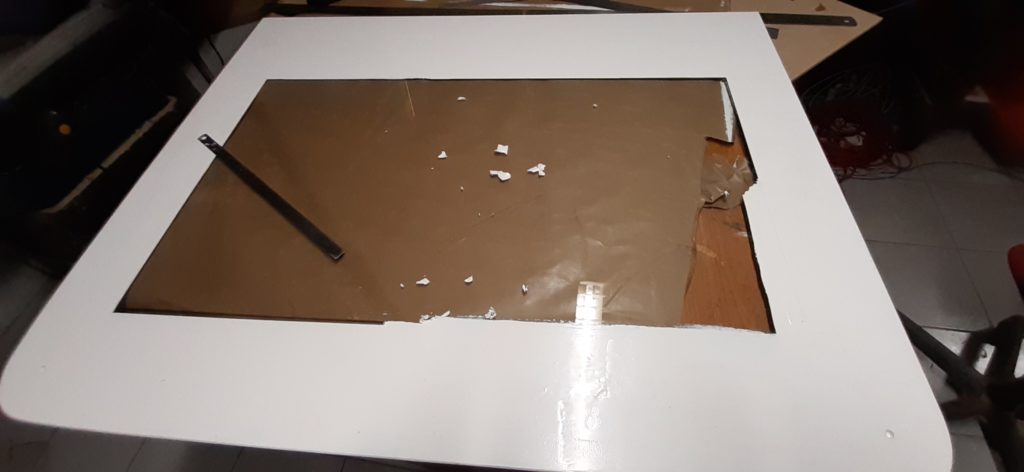
For the glass plate, I made a wooden template for cutting, it takes about 100 € to cut it in 8 millimeters. I then painted the inner side of the glass with a glossy white paint. When the paint is dry, it must be cut cleanly with a cutter according to the exact location of the screen.
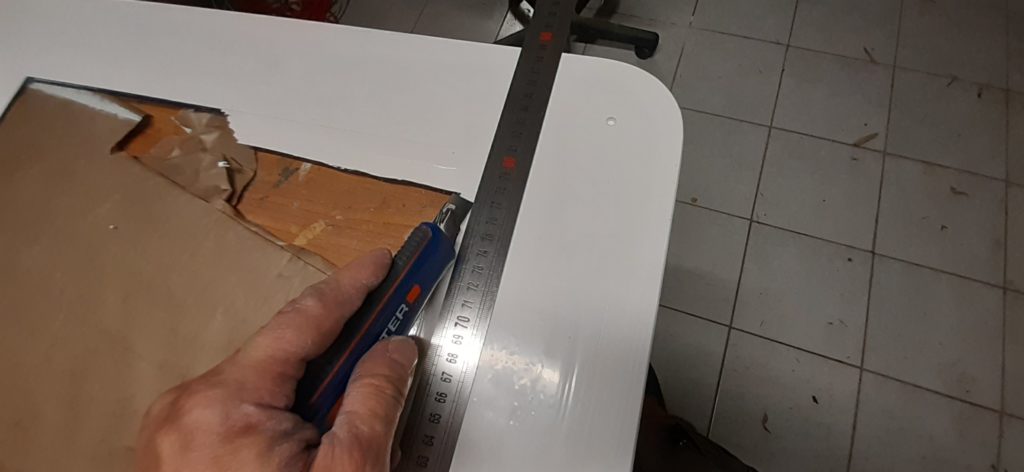
Cut the paint with a cutter 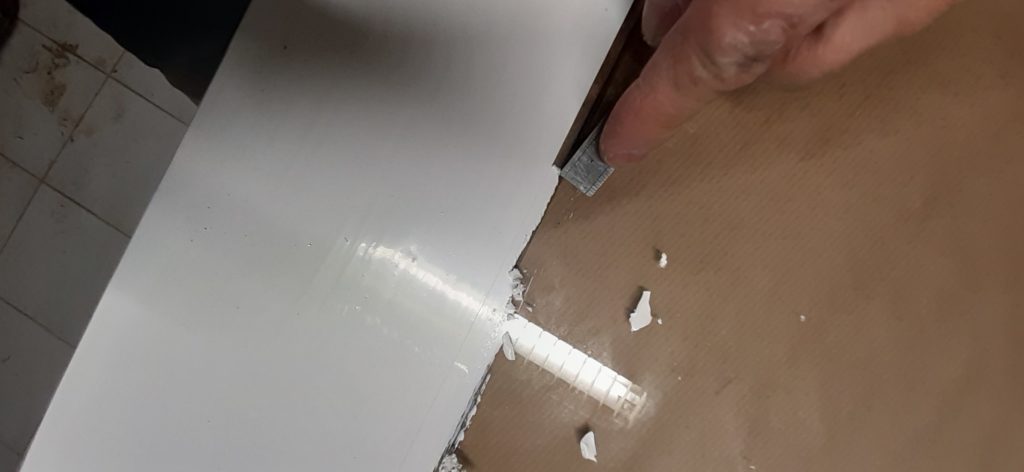
Gently remove the paint following the cutout
Buttons :
I used normal buttons that I transformed into RGB as I explained in the article “Converting (Making) a Normal Light Button into an RGB Button“. I bought 2 PACLED 64 USB to be able to connect them all (27 RGB buttons).
I bought the full version of LedBlinky to be able to control them, change the color according to the games and make animations. The free version can do the job, it lacks some features that are not blocking.
Ledblinky is supported by many “frontend” like Launchbox, Hyperspin, Attract-mode …
It is able to change the color of a button or turn it off depending on the game launched, the platform …
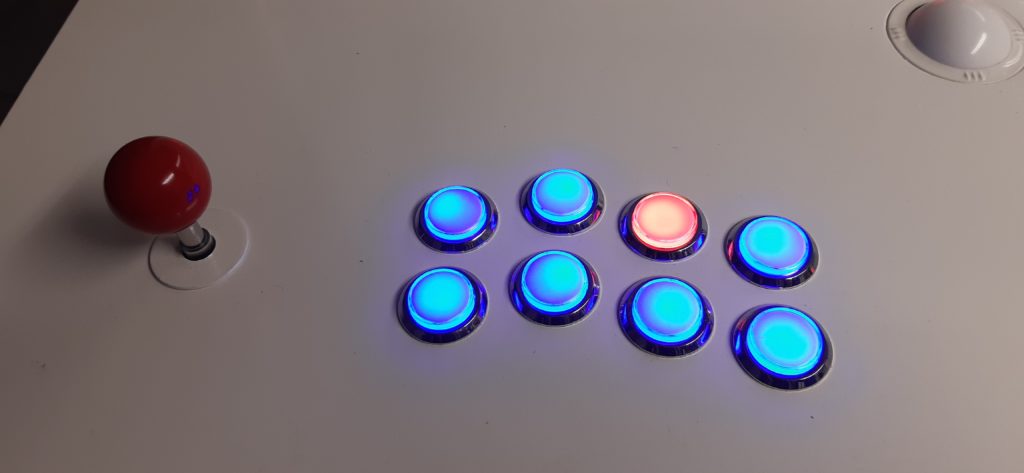
The color of the buttons changes according to the games 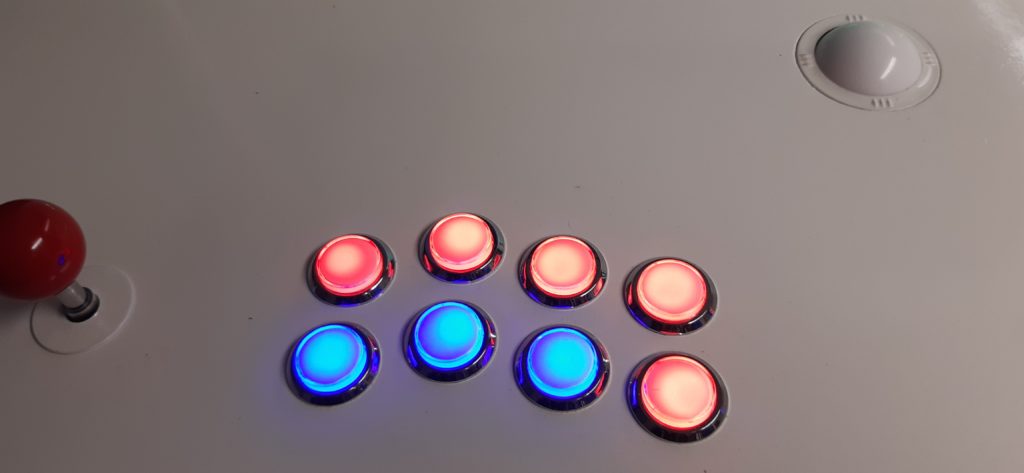
3 useful buttons for this game 🙂 
System buttons: pause, rewind, save state, load state, change CD, reset and exit 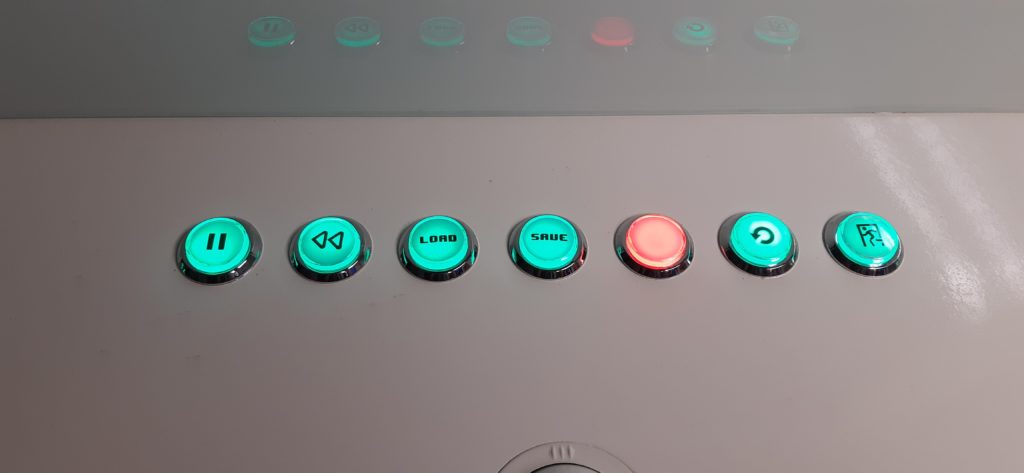
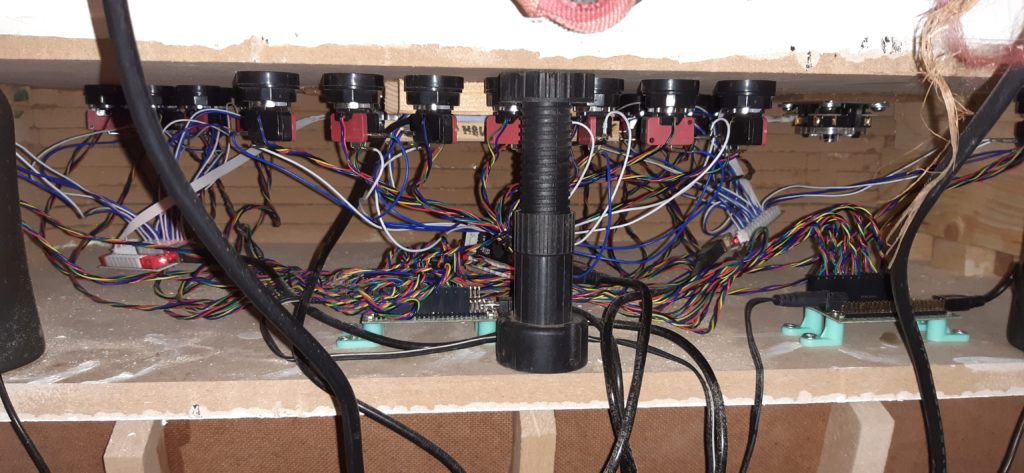
Button / joystick controllers and RGB controllers
The operating system :
I chose to use Windows 7. Why? because you can modify it so much that it is impossible to see that it is a Windows. What is not possible with Windows 10, it is impossible (as of today) to change the startup logo, or to hide the startup, logon and logoff messages.
I used Win7BootUpdater and Resource Hacker to hide texts and change Windows logos, you can download them here.
Watch the startup video below, you won’t see it’s a Windows.
[evp_embed_video url=”https://www.legeek.info/wp-content/uploads/2020/08/video_borne_2.mp4″ width=”800″ ratio=”0.345″ class=”fp-minimal” ]
For the mouse, I didn’t want to change the cursor with an “empty” cursor, because I need to be able to make changes and use the mouse at all times. My solution is to automatically place it at the top right of the screen, so it is not visible. To do this I used an AutoHotkey script that I compiled. And to be sure that the mouse does not appear, I advise you to run the 4 small files by placing them in the “Start” menu, in fact, depending on the speed of your Windows startup, the mouse could appear for a few seconds.
;Sleep, 1000   ;sleeps for 1 secs
#NoEnv  ; Recommended for performance and compatibility with future AutoHotkey releases.
SendMode Input  ; Recommended for new scripts due to its superior speed and reliability.
SetWorkingDir %A_ScriptDir%  ; Ensures a consistent starting directory.

DllCall("SetCursorPos", "int", 2560, "int", 0)  ; The first number is the X-coordinate and the second is the Y (relative to the screen).
Disable all icons on the desktop, and enable “Automatically hide taskbar”
The disks :
I used an SSD disk for Windows and 3 SATA 2TB disks for emulators, roms, videos …
The easiest way is to have a big 4TB or 6TB hard drive, but I had 3 2TB drives that I could use, so I made directory junction on the partitions of my drives. Here is a screenshot of the cutout.
The system is made like this:
C:\ [240Go SSD]
G:\ [2To SATA : 100% Disque 1]
\LaunchBox-Sicnarf
\LaunchBox-Sicnarf\Arcade PC
\LaunchBox-Sicnarf\Emulators
\LaunchBox-Sicnarf\LaunchBox
\LaunchBox-Sicnarf\LaunchBox\…
\LaunchBox-Sicnarf\LaunchBox\Games\…
\LaunchBox-Sicnarf\LaunchBox\Games\NEC TurboGrafx-CD [Jonction 250Go ]
\LaunchBox-Sicnarf\LaunchBox\Games\Nintendo GameCube [Jonction 900Go ]
\LaunchBox-Sicnarf\LaunchBox\Games\Sega Dreamcast [Jonction 600Go ]
\LaunchBox-Sicnarf\LaunchBox\Games\SNK Neo Geo CD [Jonction 650Go ]
\LaunchBox-Sicnarf\LaunchBox\Games\Sony Playstation [Jonction 650Go ]
\LaunchBox-Sicnarf\LaunchBox\Games\Sony PSP [Jonction 700Go ]
\LaunchBox-Sicnarf\LaunchBox\Games\…
\LaunchBox-Sicnarf\LaunchBox\…
\LaunchBox-Sicnarf\LEDBlinky
\LaunchBox-Sicnarf\WindowsGames [Jonction 600Go ]
The FrontEnd:
I chose to use BigBox which is the paid version of Launchbox. I don’t regret my purchase, the community is very active (themes, videos …), the product is very clean, often updated, not to mention the many options that will make your life easier.
[evp_embed_video url=”https://www.legeek.info/wp-content/uploads/2020/08/video_borne_1.mp4″ width=”300″ ratio=”2″ class=”fp-minimal” ]
Emulators :
I mostly use Retroarch except for Dreamcast (demul), Sammy Atomiswave (demul), Naomi (demul), Cave (demul), Nintendo64 (Project64) and GameCube (Dolphin).
Why Retroarch? because it handles overlays and shaders extremely well, button / joystick configuration is centralized for all emulators. Why Demul, Dolphin and Project64? because they have better graphics and sound performance.
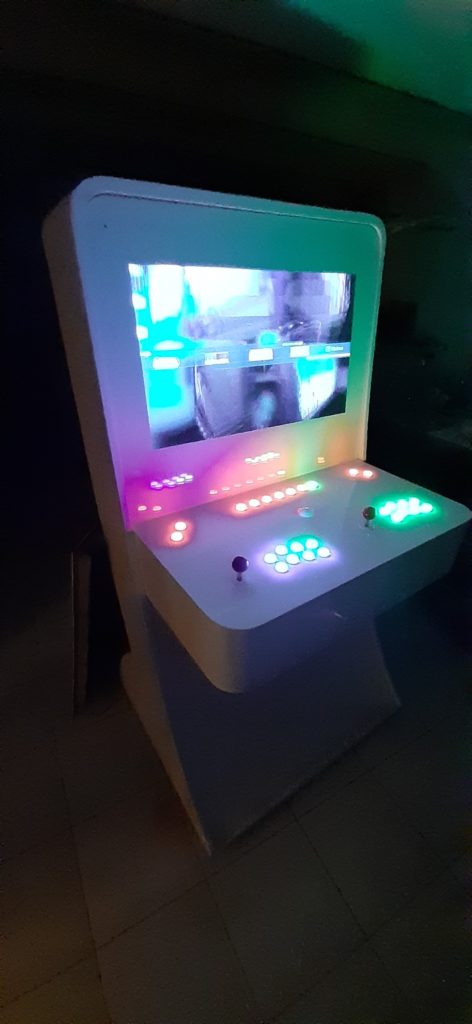
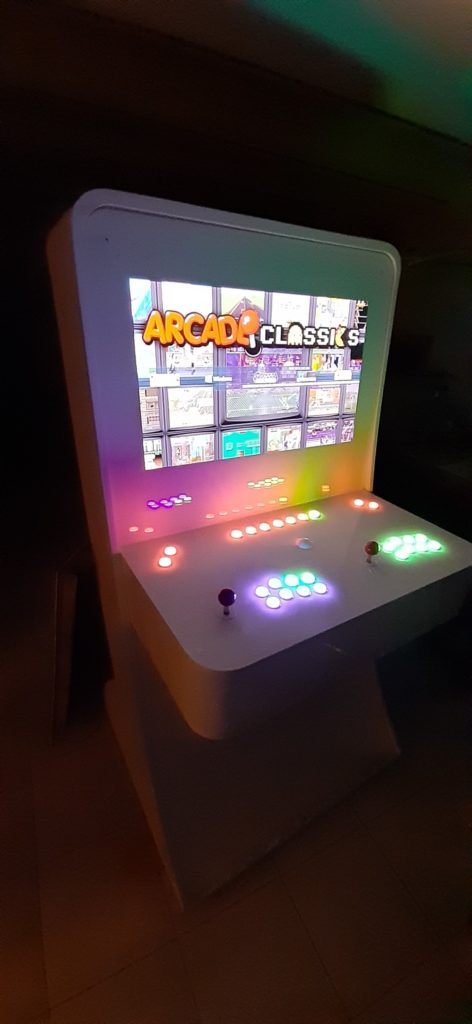
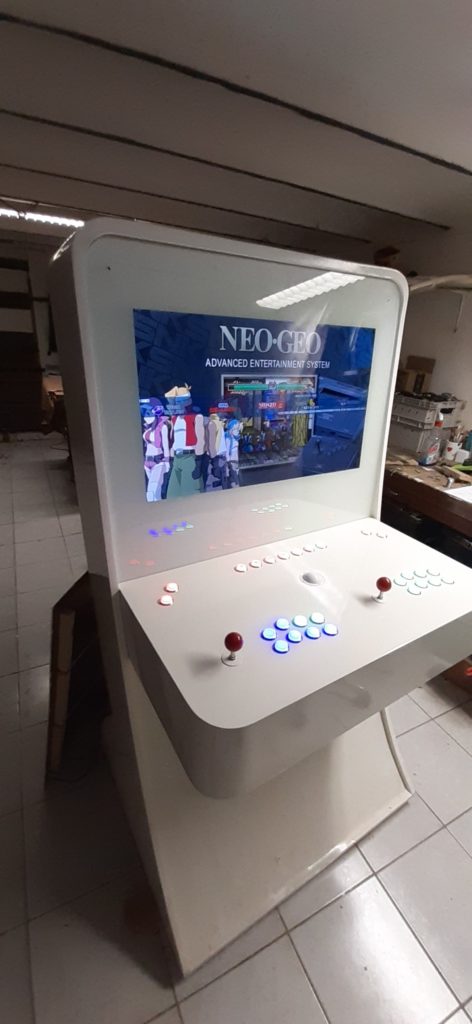
Pictures :
3 thoughts on “Building of a Nu-Gen type terminal (part 2)”
super article, merci!
nice
Belle borne ! Une estimation de prix finale ?